Showing posts with label bread. Show all posts

Sunday, April 15, 2012

Resurrection Rolls

Resurrection Rolls, a yummy way to share the Easter Story with Kids


Easter Sunday was last week, but I never got a chance to post this Resurrection Rolls recipe that we tried for the first time this year.  It's easy for kids to get Christmas and birth of our Savior story.  It's a bit more difficult for them to fully grasp his death on Good Friday and his resurrection on Easter Sunday.  We often travel for Easter, but this year we stayed home, so I knew I wanted to give these Resurrection Rolls a try with my kids. 

I'm not sure where this recipe originated.  I've seen it referenced many times in several Christian family books/magazines.  I've heard other moms talk about making them with their kids or even having made them as kids.  Sometimes they are called "empty tomb rolls".  As you make them, you can explain the death and resurrection of Jesus in a way that kids may be better able to understand.

The recipe turned out perfect!  The kids loved making them with me in the kitchen, and they were amazed to see that their rolls were empty (hollow) when we ate them with our Easter breakfast.  They will definitely be one of our Easter morning traditions for as many years as the kids will want to help me make them!

Here's the recipe:
Resurrection Rolls:
1 can large and flaky crescent rolls (regular will work okay; just harder to work with)
8 large marshmallows
2 Tbsp melted butter
1 Tbsp cinnamon
1 Tbsp sugar


1.  Mix together cinnamon and sugar in a small bowl.
2.  Place melted butter in a separate small bowl.
3.  Unroll and separate the crescent rolls.
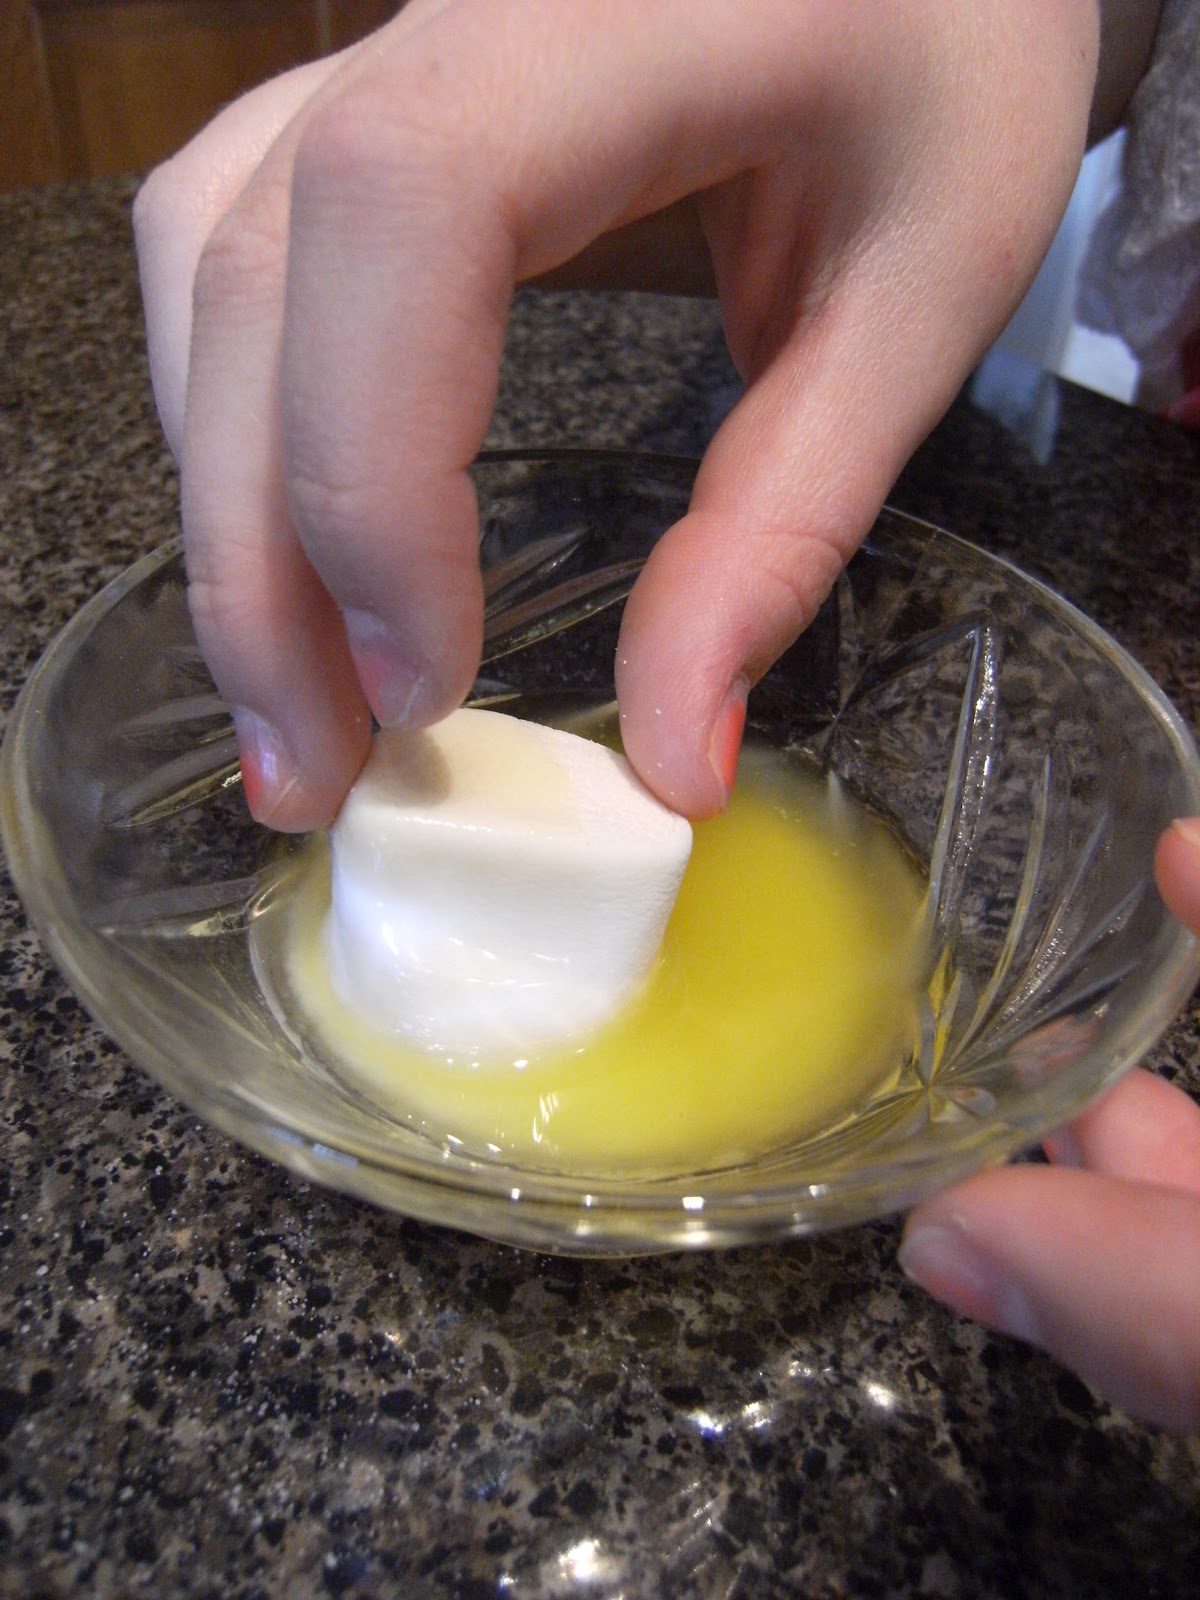
4.  Take a marshmallow (Jesus after he died on the cross) and roll it in butter and then roll it in the cinnamon sugar mixture (the oils and spices used in his burial)

5.  Place the coated marshmallow in the top third of the triangular shaped piece of dough. 
6.  Wrap the skinny part over the marshmallow and roll the marshmallow towards the wide bottom part of the dough piece.


7.  Fold up the wide bottom piece of dough (kind of like a diaper) so that the marshmallow is fully wrapped in the dough  (Jesus all wrapped up) and place on a cookie sheet.


8.  Bake for 15-18 minutes at 375 until light golden brown.

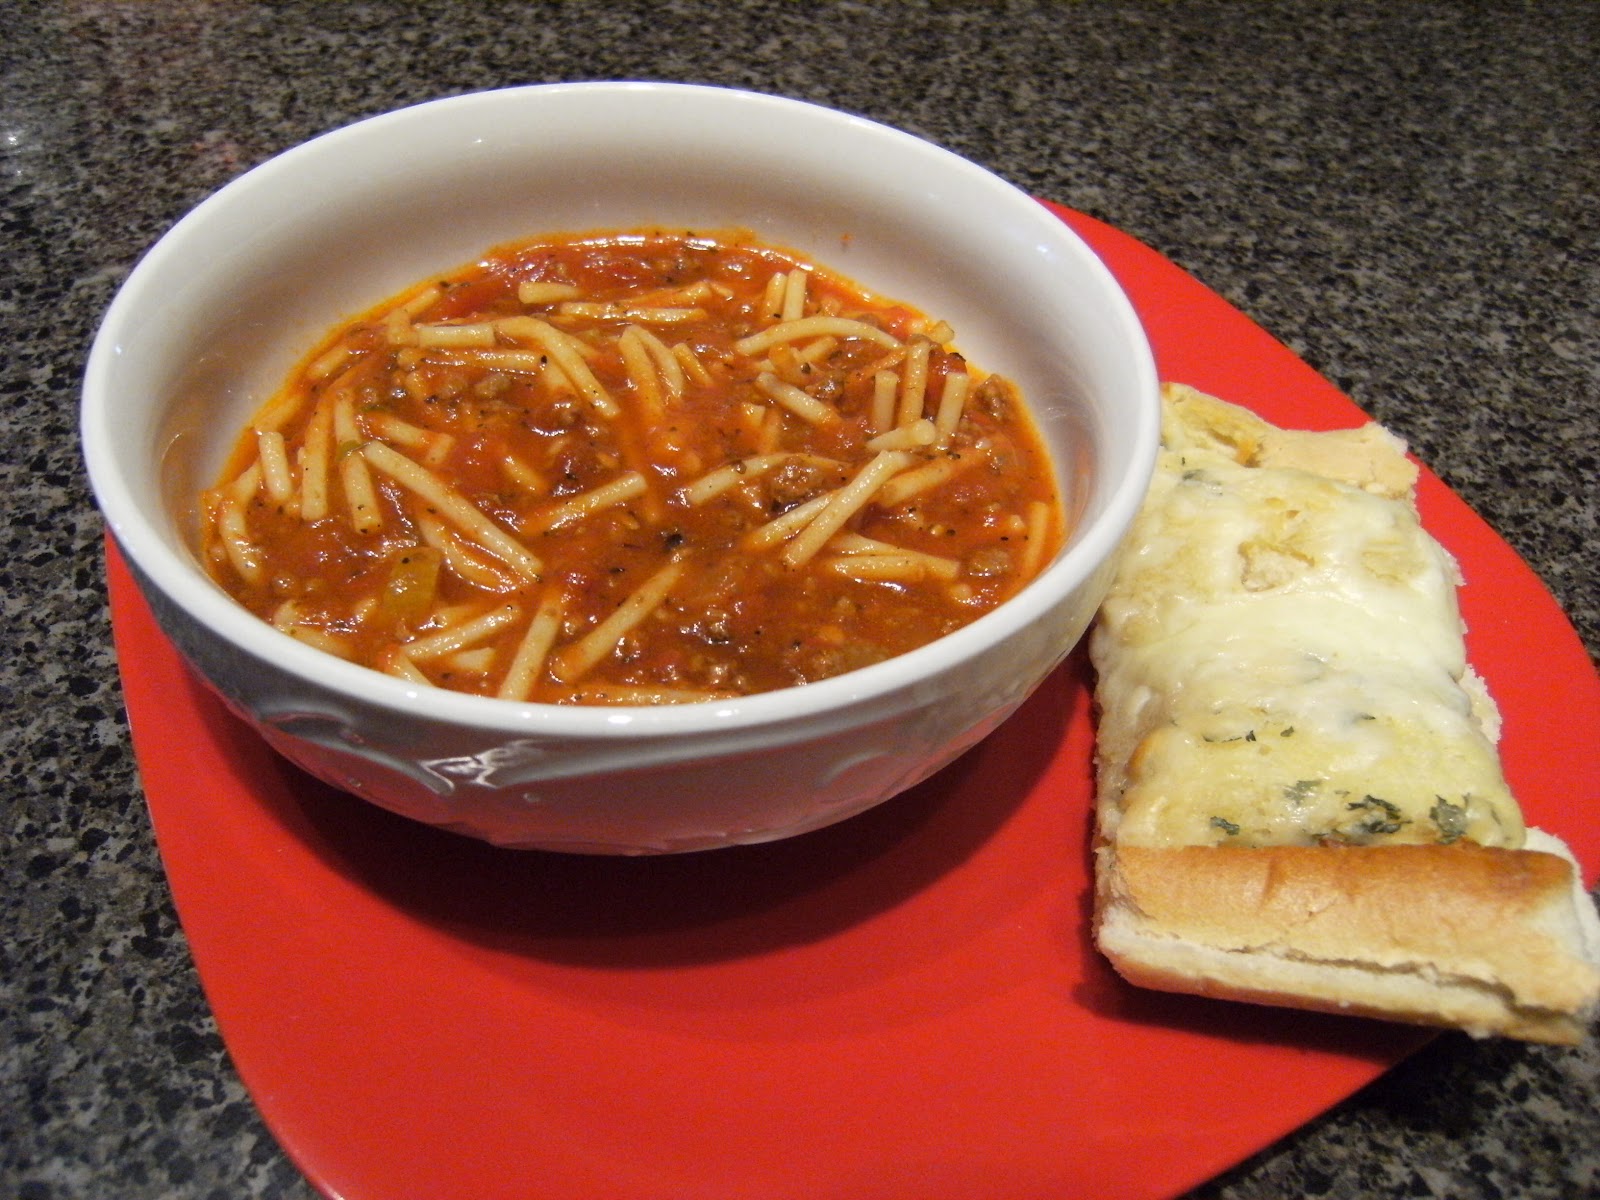
The most amazing thing happens while they bake!  The marshmallow disappears!  The rolls will be hollow on the inside when you break them open.  The kids LOVED seeing this!  They thought the rolls would be all gooey like a smore.  They did not expect them to be all hollow.  Their surprise made a great discussion around the table as to the surprise that Jesus' friends must have felt when they went to His tomb on Sunday morning.


Resurrection Rolls - The Tomb is Empty!
The cinnamony sweet rolls were an excellent addition to our Easter morning brunch of hard cooked eggs, sausage links, and fresh pineapple.

What's your favorite traditional Easter recipe?

Wednesday, February 29, 2012

Spaghetti Soup and Cheesy Garlic Bread

I love making soup!  You've probably noticed soup is on our fall/winter menu quite a bit.  I love making soup because I become like a magician in the kitchen.  I can take nothing and turn it into something.  Spaghetti Soup is one of my family's favorite recipes that I created from a bunch of nothin' and turned it into something great!

Do you ever have just a little bit of spaghetti sauce leftover at the end of dinner?  I'll make a pound of pasta and a batch of sauce, but it always seems we have one scoop of sauce leftover at the end of the meal.  I used to just toss that away because it seemed like it was not enough to bother with.   Then one day, I needed something for dinner that needed to be made from the ingredients on hand because the littlest one was down for a nap and there was no time to go to the store before dinner.  I had a small bowl of spaghetti sauce in the fridge and just started adding some things to it into make a soup.  The end result was fantastic!  Now, instead of throwing away those small bits of sauce, I freeze them and when I have about 1 1/2 - 2 cups of sauce collected, I make a batch of this Spaghetti Soup

The kids love this dish!  The littlest one scraped her bowl clean before I had a chance to even finish my salad!   The soup comes together in under 30 minutes which is perfect for our busy afterschool schedule.  The soup cooked while I made a loaf of garlic cheese bread and helped supervise some music practice.  If you choose to make the soup ahead, it will thicken up so you'll have to add a little water before serving it.  Because I made this soup from all our leftover bits and pieces, it was very economical.  It's a good end-of-pay-period kind of meal or great for a night when you might want to spend your grocery budget on a fancy dessert or a family ice cream date.

Here's the recipe:

Spaghetti Soup
1 Tbsp olive oil
2-3 Tbsp chopped onion and celery
1 tsp minced garlic
1 1/2 - 2 cups of leftover spaghetti sauce
1 can of diced tomatoes (I use home canned tomatoes from my mother in law)
1 can of tomato sauce (small or large can; whatever you have)
2 cups beef broth (or 2 cups water and 2 beef bouillon cubes)
1/2 - 1 Tbsp Italian seasoning
1/2 tsp salt
1/4 pound of spaghetti noodles broken in 1 inch pieces
Parmesan cheese for garnish

1.  Drizzle olive oil in a large stock pot.
2.  Saute onions and celery until opaque.
3.  Add garlic, spaghetti sauce, tomatoes, and tomato sauce.  Rinse out the cans/containers with a little water (no more than 3/4 cup total)
4.  Add beef broth, salt, and Italian seasonings and stir.
5.  Bring to a boil.
6.  Add spaghetti noodles and stir.
7.  Cook at a low boil until noodles are tender and soup thickens. (about 15 -20 minutes)

Serve with pamesan cheese on top.  (You'll have to imagine some parmesan on the top of this bowl in the picture.  I forgot to take a picture BEFORE we ate, and this was all that was left!  Our original bowls were filled a bit more towards the top!)

Spaghetti Soup and Cheesy Garlic Bread


My kids love to order cheesy garlic bread whenever we get pizza!  I picked up a loaf of fresh Italian Bread on the way home from school and thought it would make a great addition to our soup.  We LOVED this bread!  They all said I could give Donatos a run for their cheesy garlic bread money!  Try some today!

Cheesy Garlic Bread
1 loaf of Italian Bread (often $1 or less at Kroger)
4-5 Tbsp Spreadable Butter (I used Country Crock)
1 tsp garlic powder
2 tsp of dried parsley
few shakes of salt
1 cup of shredded mozzarella cheese (or Ital blend with provolone)

1.  Slice bread horizontally.
2.  In a small bowl, mix together the butter, garlic powder, parsley, and salt.
3.  Spread the butter mixture on the bread evenly.
4.  Sprinkle cheese on top of the buttered bread.
5.  Place cheese topped bread on a baking sheet and bake at 375 for 15 minutes.
6.  Slice cheesy garlic bread into wedges.

Cheesy Garlic Bread
Your house will smell like a pizzeria with this fresh baked bread topped
with ooey, gooey cheese and a hint of garlic.  I'll take you on, Donatos!

Thursday, February 2, 2012

I Did It! I Made My Own Artisan Bread!

A couple of years ago, my husband was looking for a new creative hobby,  one that didn't require a ton of time or a large financial investment.  As we sat talking one evening, I said, "You love bread!  Why don't you learn to make bread?  I saw this book at the library about making bread in 5 minutes a day.  Maybe you could try it."

Well, he tried it, and it was great!  Very similar to that yummy bread at Panera or from the bakery at Giant Eagle.  The problem?  It was so deliciously yummy that the baby #3 pounds I had worked so hard at getting off through Weight Watchers started coming back on.  I have a weakness for homemade bread.  The 5 minute bread process was easy, but it made a large quantity of dough.  The idea behind the method was that by making a large batch of dough that could be refrigerated, you could have fresh bread daily without having to go through the work of making dough daily.  We started eating this bread often to use up the large quantities of dough he would make, until I asked him to stop baking for the sake of my backside.  Slightly discouraged, John quit making bread and moved on to other hobbies.

One of the things I love about reading food blogs is that I'm inspired or challenged to think about foods in a new way.  Mom on a Mission writes often about her love of the 5 minute bread dough that she has adapted for so many of her easy recipes, so I decided to again check out the Artisan Bread in 5 Minutes a Day book by Jeff Hertzberg and Zoe Francois from our local library.  I set a goal for myself to do some more research and learn to bake a good loaf of artisan bread by the end of January.

On January 31, after reading the book, consulting some tips on the Internet, and reading this post on Mom on a Mission about baking multiple loaves of artisan bread, I decided to give it a try.  The 3 year old and I mixed together this easy dough in less than 5 minutes.  We covered it with a towel during our playdate with a friend, formed the risen dough into 4 small round loaves after lunch, took a bike ride in the unseasonably warm afternoon while the oven preheated, put the loaves into the oven, and 30 minutes later we had 4 perfect loaves of artisan bread!  Plus our house smelled like Panera!

This bread could not have been easier to put together, and I love the fact that the recipe was pretty much foolproof.  No worrying about if I had it kneaded enough; no kneading is necessary.  No weird ingredients; just flour, salt, yeast, and water.  No fancy mixing utensils; just a large bowl and a wooden spoon.  Thanks to the tips from Mom on a Mission, I did not even bake the loaves on a baking stone as was directed in the book.  I just used parchment paper, and the bread turned out fine.  It was still crunchy on the outside, tender on the inside, slightly dense texture. . . perfect!  We ate one loaf with our dinner, and I gave a loaf to each of the girls' teachers at their respective music lessons that evening.  The 4th loaf was wrapped and put into the freezer, although I could have easily eaten at least 1/2 of the loaf that night by myself! 

Having success with this first batch got my recipe wheels turning, and I can't wait to try out some other variations.  A loaf every now and then can be worked into my weight management plan.  In the meantime, I highly suggest you add yeast and a bag of flour to your shopping list this week and make a batch of this easy bread dough soon.  

Here's the recipe:

5 Minute Artisan Bread
3 cups of lukewarm water (100 degrees; I tested it using a thermometer just to be sure)
1 1/2 Tbsp yeast (the kind in a jar, not the packets)
1 1/2 Tbsp Kosher salt
3 1/2 cups all purpose white flour
3 cups white whole wheat flour
(You can also substitute with 6 1/2 cups white flour; I tried to make it a bit healthier)

1.  Pour the water into a large mixing bowl.
2.  Stir in the yeast and salt in the water with a wooden spoon.  (It's okay if it does not all dissolve).
3.  Using a scoop and sweep method, add the flour to the bowl.  (Scoop the flour from a large container into your measuring cup and then sweep the top of the measuring cup with the back of a butter knife to level it off)
4.  Using a large wooden spoon, mix the flour into the liquid until there are no more dry spots.  DO NOT KNEAD; JUST MIX!
5.   Place a cover lightly over the bowl, and let the bowl sit on the counter for 2 hours or so.

At this point, you can either refrigerate the dough as described in the book or go ahead and make a loaf (or 2 or 3 or 4) at this time.  I like to make things as easy as possible, so I just went ahead and made all 4 loaves.  It worked like a charm.

To turn the dough into bread, follow these easy steps:
1.  Tear off 4 sections of parchment paper, place them on your counter, and sprinkle lightly with corn meal.
2.  Divide your dough into 4 sections using a serrated knife. 
3.  With a little flour on your hands, take one section (about the size of a grapefruit) and stretch it and quickly tuck the ends under to form a small round loaf.
4.  Place the loaf on a piece of parchment paper.  Repeat with the remainder of the dough.
5.  Place your broiler pan on the bottom shelf of your oven and place an inch or so of water in the pan.
6.  Turn your oven on 450 while your bread loaves "rest" on the counter for 30-40 minutes.  (I have a good oven, but it still took nearly 30 minutes to get to 450.)
7.  Lightly dust the tops of the loaves with flour and pull a serrated knife through the top to make slits or a tic tac toe board.  (I forgot this step, and they turned out fine)
7.  After 30-40 minutes and when your oven temperature reaches 450, carefully put the parchment paper and the bread loaves on the oven shelf.  (I was able to get 4 loaves on one shelf in the middle of the oven.)
8.  Bake for 30 minutes until browned. 
9.  Remove from oven carefully and let cool on wire racks.
10.  Slice with a serrated knife once completely cool.

Enjoy with butter, dipping oil, or plain.  It's just scrumptious any old way!  Give an extra loaf to a favorite person in your life, or put them away in the freezer to enjoy another day.

In all the excitement, I forgot to take a photo of the baked bread loaf!  The bread came out of the oven just as I was leaving to go to school to pick up the girls and then one daughter had an afterschool club meeting, both girls had music lessons, and we had math night at the girls' school in the evening.  I'm not used to capturing every moment of my kitchen adventures on camera yet.  Here it is sliced up on our dinner plate, however. 

Baked Ziti, Caesar Salad, Grapes, and Artisan Bread


What's your favorite way to enjoy artisan bread?

Sunday, January 22, 2012

Spinach Salad and Beer Bread

John had a limited vegetable pallet when I first met him.  Nonetheless, he was raised right by his mom, because he always ate whatever I served on his plate when he came over for dinner during our early dating days.  His face was a bit apprehensive, however, when I laid down a large bowl of my favorite spinach salad one night as our main dish.

Spinach Salad

"Just try it," I said.  "It's the same salad they serve at this restaurant where my parents used to go for all their big celebrations. (The Red Geranium in New Harmony, IN)  It's really good!  It's one of my mom's best recipes!"

Lucky for me, he was enticed by the bacon on top.  And he was hungry.  And he had nothing to eat back at his own apartment.  Plus, what's not to like about a salad with fresh cooked, real bacon on top?

Well, he tried it, and fell instantly in love with the combination of tender spinach, salty bacon, and the sweet and tangy tomato dressing.  Now when people ask him what his favorite vegetable is, he almost always says "Jill's spinach salad".

There is nothing too tricky about this salad.  The dressing has to be made in a blender, however.  I have not had good luck getting it to come together the way it should any other way.  One recipe makes enough to use for at least one bag of spinach or maybe even two.  The thick dressing has a rich and tangy flavor, so it doesn't take too much drizzled over the top to make it a yummy salad.  Sometimes I'll make a batch when I'm in the mood for the salad and then just pick up the spinach and bacon on my next trip to the store. 

We like to enjoy this hearty salad as a light dinner, or sometimes I'll fix a smaller version to go with our main dish.  Tonight we enjoyed the salad with fresh hot slices of homemade beer bread and cantaloupe.  This simple, summer-type meal was the perfect reminder on this damp day that warm, summer weather will return before too long. 

Here's the recipe for the dressing:

Red Geranium Spinach Salad Dressing
1 cup canola oil
3/4 cup sugar
1/3 cup ketchup
1/4 cup vinegar
1 Tbsp Worcestershire sauce
1/2 tsp onion powder
1 tsp salt

Place all ingredients in a blender and blend until all the sugar crystals are dissolved. 

Store in the refrigerator and shake well before serving over a bed of spinach topped with chopped bacon and diced hard cooked eggs.  You can also add fresh mushrooms and croutons, but we like it with just the spinach, bacon, and eggs.

tender spinach, salty bacon, hard cooked eggs, sweet and tangy dressing
This is the salad that will turn even the pickiest eater into liking spinach!


When John and I lived in Madison, Wisconsin, we loved visiting the enormous farmers' market held in the Capitol Square downtown.  One of our favorite purchases was a loaf a homemade beer bread.  We've never found another bread that tasted as good as that baker's, but this one is pretty good.  It is a dense bread with a crunchy outside.  Slice it thick and slather on a little butter.  The 11 year old loves to have a piece leftover for breakfast, lightly toasted.

Homemade Beer Bread
Homemade Beer Bread                                               
3 cups white whole wheat flour
4 1/2 tsp baking powder
1 1/2 tsp salt
1/3 cup brown sugar
1 bottle of beer (12 oz)    (I used Bud Light)

1.  Preheat oven to 350.
2.  In a large bowl, combine the dry ingredients.
3.  Pour in the beer over the top.
4.  Stir until all the ingredients are moistened.  (the batter will be really thick and stiff)
5.  Spread into a greased loaf pan.
6.  Bake for 50-55 minutes until an inserted toothpick comes out clean.

How do you like to eat your spinach?