My 11 year old informed me afterschool today that tomorrow, March 14, is International Pi Day! (You know pi. . . . 3.14. . . like you learn about in math class. . . . ) In celebration of this grand event, I announced that we would be eating only round foods for dinner on Wednesday! The kids decided we should have pizza, salad served in a bowl, and ice cream pie for dessert. I'm sure we'll tie in a few measurement lessons before we dig in. The kids are certainly excited about dinner, and I love any kind of dinner celebration!
I tried out the Pioneer Woman's Pizza Crust recipe last week with great success! I made a few changes to her original recipe, namely I did not let it rest in the refrigerator as she describes. I just made it a few hours ahead because we had a few last minute changes in our schedule and meal plan. I let it rest on the counter similar to the artisan bread recipe. The dough was sticky, but with a little flour on my hands, I was able to turn it into a pizza crust with no problem at all. The crust was delicious with just the right amount of crunchiness and chewiness to suit our family's tastes. I love that I did not have to knead the dough as I seem to lack kneading skills.
Here's the recipe from Pioneer Woman:
Pizza Crust
1 teaspoon Active Dry Or Instant Yeast
4 cups All-purpose Flour
1 teaspoon Kosher Salt
1/3 cup Extra Virgin Olive Oil
1. Sprinkle yeast over 1 1/2 cups warm (not lukewarm) water.
2. In a mixer, combine flour and salt.
3. With the mixer running on low speed (with paddle attachment), drizzle in olive oil until combined with flour.
4. Next, pour in yeast/water mixture and mix until just combined.
5. Coat a separate mixing bowl with a light drizzle of olive oil, and form the dough into a ball.
The Pioneer Woman states to put the dough into a greased bowl and cover and place in the refrigerator for at least 24 hours. I did not. I just let mine sit on the counter in a greased bowl covered with a towel. It still worked. Not sure if it tasted like Ree Drummond's, but it was still good.
We'll be having our pizzas topped with round pepperonis of course! I wonder what other round things I can come up with to put on the pizza in honor of International Pi Day!
For dessert, we'll be having one of my easy desserts - ice cream pie. This is one I have shared with many friends looking for a tasty easy dessert. The trick to making this one look like something fancy is all in the presentation. I just drizzle some sort of topping all over the plate artistically like they do at restaurants. It fools my guests every time. They think I spent hours and hours making some fancy dessert. I never tell them this one takes less than 5 minutes to prepare!
I have made endless variations on this easy ice cream pie. Some of my favorites are mint chocolate chip in a chocolate crust drizzled with dark chocolate, black raspberry chip in a chocolate crust drizzled with marshmallow, butterfinger in a chocolate crust sprinkles with additional butterfinger candies, prailenes and cream in a graham cracker crust topped with caramel and Heath chips, strawberry cheesecake in a graham cracker crust topped with strawberry syrup. . . the possibilities are endless.
Easy Ice Cream Pie
Graham Cracker Pie Crust (chocolate, regular, low fat, shortbread, store brand, homemade)
1/2 gallon of your favorite ice cream, softened
Ice Cream topping (chocolate, caramel, marshmallow, butterscotch, etc)
whipped cream
cherries or chocolate shavings or sprinkles or something for garnish
1. Pick your favorite ice cream and topping combination.
2. Soften ice cream on the counter for 10 minutes. (Often I make this right when I come home from the store as the ice cream is just about perfect)
3. Carefully spoon the softened ice cream into the graham cracker crust. (Sometimes I add a layer of ice cream topping on the bottom before I put on the ice cream. Hot fudge works great as a bottom layer)
4. Cover the pie and freeze for several hours before serving.
5. Remove from freezer about 10 minutes before you want to serve dessert.
6. Cut a slice of pie and place on a plate. Drizzle the top with additional topping and whipped cream and garnish so that it looks like something you'd get from a restaurant.
7. Serve with a smile.
I'll be sure to post pictures of our Pi Day Celebration!
What round foods will you be serving on your table in celebration of International Pi Day?!
Showing posts with label pizza. Show all posts
Showing posts with label pizza. Show all posts
Tuesday, March 13, 2012
Thursday, January 19, 2012
Fresh Tomato Pesto Pizza
Last week at Meijer, I picked up two containers of FREE cherry tomatoes by combining a weekly special with a coupon. We used the first container of tomatoes on our salads all week, but I had that second container still sitting on the counter just waiting to be created into something budget friendly, easy to fix, and a family favorite.
I received a post from The Pioneer Woman Cooks on tomato bruschetta that inspired me to create a similar dish for our dinner last Friday night. I saw a picture of the very same little cherry tomatoes on her counter that were sitting on mine. She chose to use her tomatoes to make bruschetta. I chose to use mine for a fresh tomato pesto pizza.
The result? A light dinner that was perfect for our on the go sports night between basketball practice and gymnastics team practice for the two big girls. It was like a taste of summer in the depth of the January cold. The best parts? It cost under $3, came together in about 20 minutes, and everyone ate it without complaining!
My mom had a big harvest of fresh basil this past fall and she brought down a huge bunch of it when they came to visit in October. It was way too much to use up fresh, so we did the next best thing. We whipped up a batch of pesto with some olive oil, parmesan cheese, and garlic. Then we divided up the pesto into smaller freezer containers so we could enjoy that fresh made taste throughout the year. I'd need about 1/2 cup to make the base for our pizza.
Here's the other ingredients gathered on the counter, ready for recipe creation. (I forgot to put the pesto container on the counter before taking the picture.)

I chose to make my own pizza crust this time, but you could use a premade crust, a refrigerated roll out pizza crust, a loaf of frozen bread dough, or even tortillas or pita breads. Over the years, I've used all of these for pizza crusts depending what I had on hand or what I could get for very low cost using store specials and/or coupons. I also chose to use a mix of white and wheat flour this time in the crust and the results were quite good.
After you have your crust rolled out on the pan, spread a thin layer of pesto over the top. Sprinkle with a little kosher salt and pepper to bring out the flavors. Layer on your sliced tomatoes, top with cheese, and you're ready to go. (You could also add chicken; we just didn't have any leftover because the kids ate so much of the shredded chicken earlier in the week!)

Bake in a preheated 425 degree oven for about 12-15 minutes or until bubbly. Let stand a few minutes before cutting. Serve with a plate that is 2/3 full of fruits and vegetables for a well balanced meal.

I received a post from The Pioneer Woman Cooks on tomato bruschetta that inspired me to create a similar dish for our dinner last Friday night. I saw a picture of the very same little cherry tomatoes on her counter that were sitting on mine. She chose to use her tomatoes to make bruschetta. I chose to use mine for a fresh tomato pesto pizza.
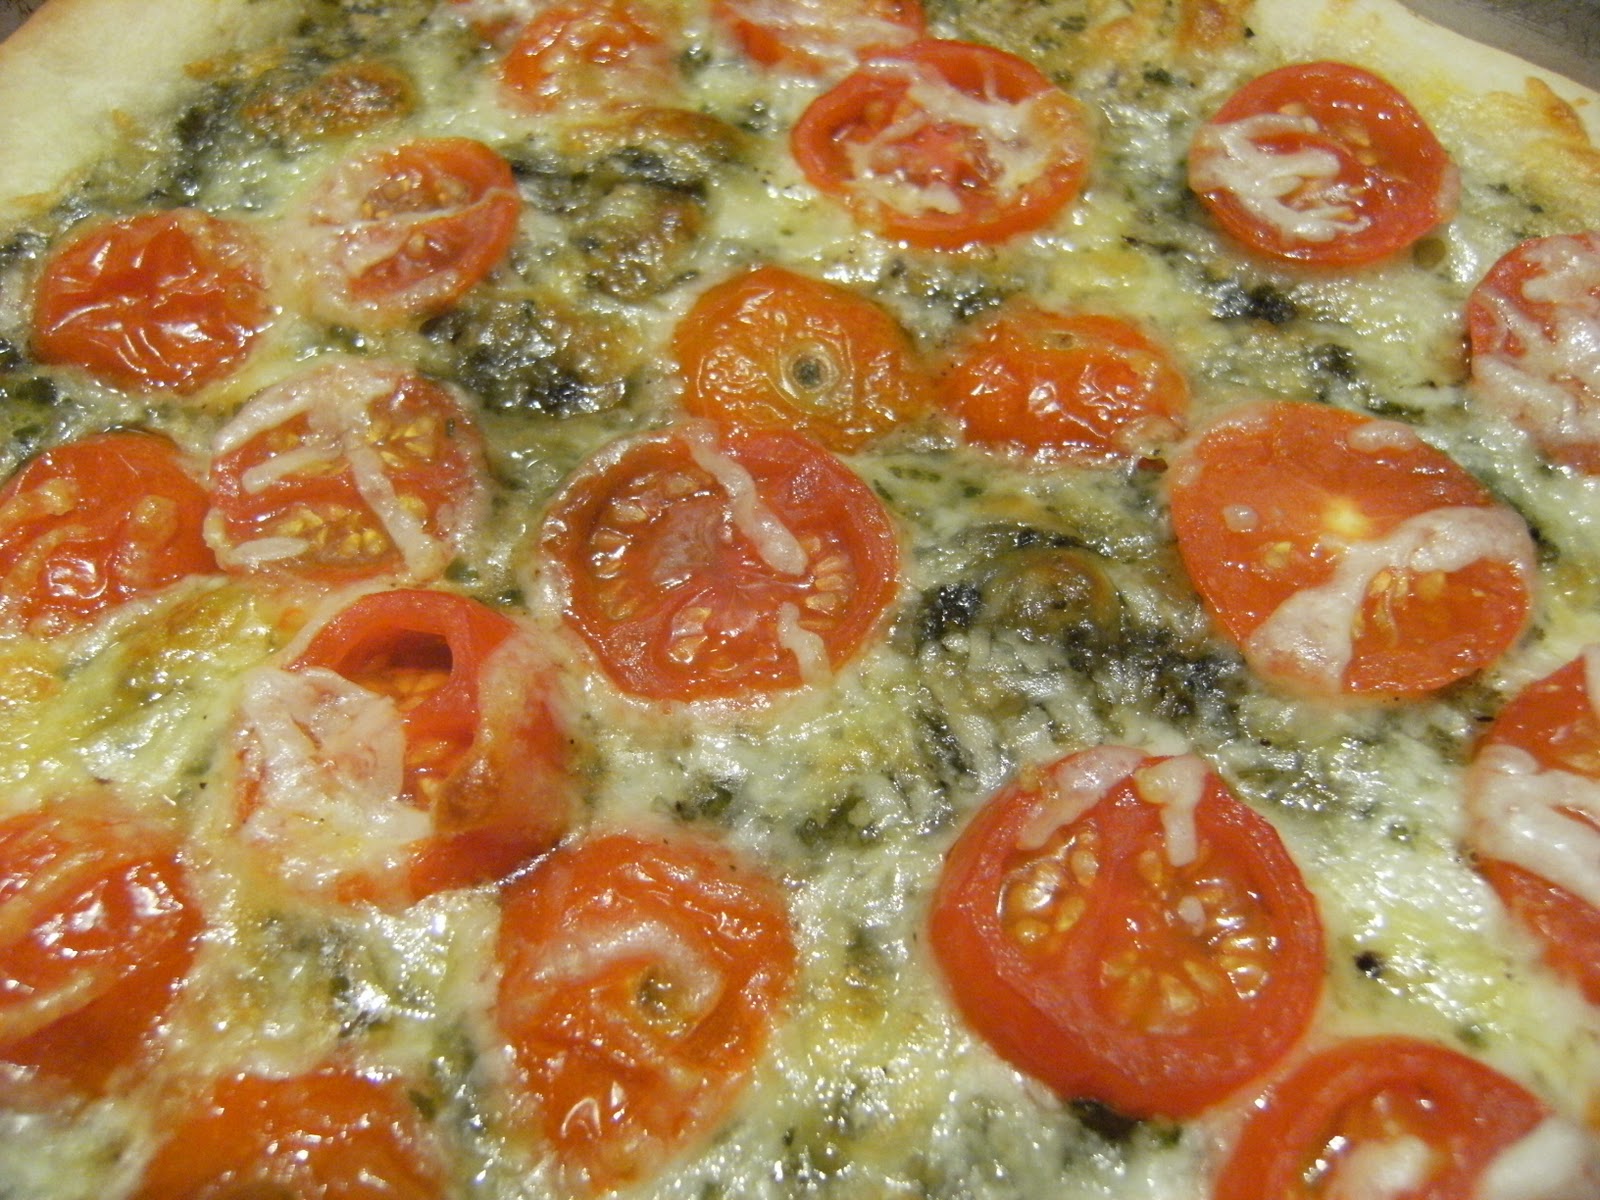 |
| Sweet basil, robust garlic, tender tomatoes, ooey gooey cheese. . . .yum |
The result? A light dinner that was perfect for our on the go sports night between basketball practice and gymnastics team practice for the two big girls. It was like a taste of summer in the depth of the January cold. The best parts? It cost under $3, came together in about 20 minutes, and everyone ate it without complaining!
My mom had a big harvest of fresh basil this past fall and she brought down a huge bunch of it when they came to visit in October. It was way too much to use up fresh, so we did the next best thing. We whipped up a batch of pesto with some olive oil, parmesan cheese, and garlic. Then we divided up the pesto into smaller freezer containers so we could enjoy that fresh made taste throughout the year. I'd need about 1/2 cup to make the base for our pizza.
Here's the other ingredients gathered on the counter, ready for recipe creation. (I forgot to put the pesto container on the counter before taking the picture.)

I chose to make my own pizza crust this time, but you could use a premade crust, a refrigerated roll out pizza crust, a loaf of frozen bread dough, or even tortillas or pita breads. Over the years, I've used all of these for pizza crusts depending what I had on hand or what I could get for very low cost using store specials and/or coupons. I also chose to use a mix of white and wheat flour this time in the crust and the results were quite good.
After you have your crust rolled out on the pan, spread a thin layer of pesto over the top. Sprinkle with a little kosher salt and pepper to bring out the flavors. Layer on your sliced tomatoes, top with cheese, and you're ready to go. (You could also add chicken; we just didn't have any leftover because the kids ate so much of the shredded chicken earlier in the week!)

Bake in a preheated 425 degree oven for about 12-15 minutes or until bubbly. Let stand a few minutes before cutting. Serve with a plate that is 2/3 full of fruits and vegetables for a well balanced meal.

Subscribe to:
Posts (Atom)